“Time to remove or rotate your AWS access keys”
If you receive an email from Amazon Web Services with the title “Time to remove or rotate your AWS access keys” it’s because you’ve got root access keys in your account that are more than a year old, and Amazon wants you to remove them.
If you’re using Arq to back up your files to AWS, you probably created a root access key over a year ago and used that to configure Arq to back up to S3 or Glacier.
Originally, you could log into the AWS console and see your root key pairs (access key ID and secret access key) just by clicking on a link. But in April 2014, AWS removed the ability to retrieve your root access keys, for 2 reasons. First, they want you to store the secret access key yourself, not make it easily viewable through the AWS console. Second, they’d rather you use IAM to create a key pair that has specific access to resources, rather than a root key pair that has permission to do everything.
You have 3 choices:
- Ignore the email and keep using the key pair you’re using
- Create a new root key pair and use that
- Create an IAM user and use that
Remove Your Root Access Key
Your AWS account can have multiple root key pairs, plus multiple IAM key pairs. These are not separate accounts; they all give you access to the same data in your account (depending on the key pair’s permissions).
To remove a root access key, go to the Security Credentials page. (If you get a pop-up about IAM, click “Continue to Security Credentials”.)
Next, click on the + sign next to “Access Keys”. You’ll see a list of your root access keys. Click “Delete” next to each one to delete it.
Create a New Root Access Key
(If you’d rather switch to IAM and limit the permissions of the key pair you create, follow the instructions in IAM and Arq instead.)
Click the Create New Access Key button to generate a new key pair:
Click the “Download Key File” to save the key pair on your hard drive. It’ll be in your Downloads folder, probably named “rootkey.csv”.
Click the “Show Access Key” link to see both the Access Key ID and the Secret Access Key on screen.
Configure Arq with the New Key Pair
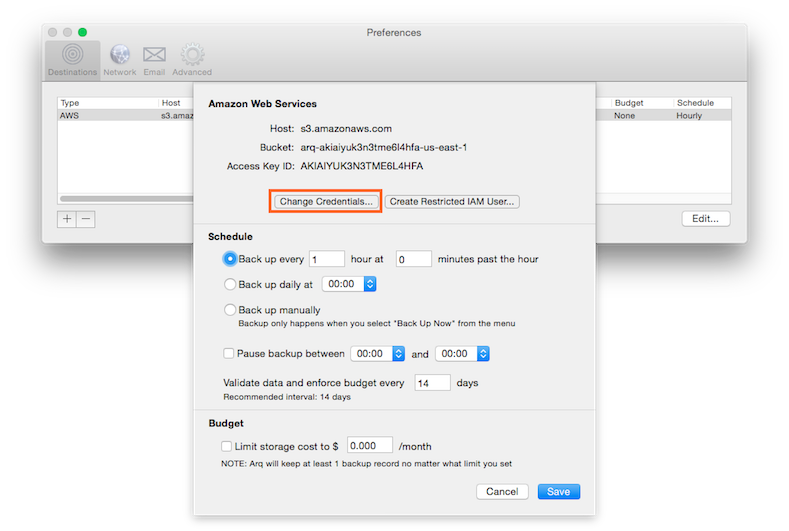
Next, launch Arq and pick “Preferences” from Arq’s menu. Click on the Destinations tab. Then double-click your destination and click “Change Credentials”.
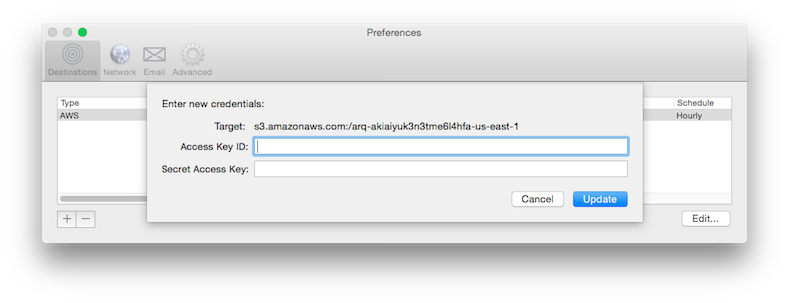
Copy your new key pair into the fields and click Update.
Now Arq is configured to use your new key pair.


