IAM and Arq
If you’re backing up to Amazon Web Services with Arq, you’ll need a “key pair” consisting of an “access key ID” (the public key, like a username) and a “secret access key” (the private key, like a password).
You could create a root key pair with permission for everything, but AWS prefers that you create an IAM user with restricted permissions and use its key pair.
Using IAM with Arq
To create an IAM user, follow the steps shown in our video:
Now that you’ve created the key pair for your new IAM “administrator” user, use it to configure Arq.
Configuring Arq with IAM
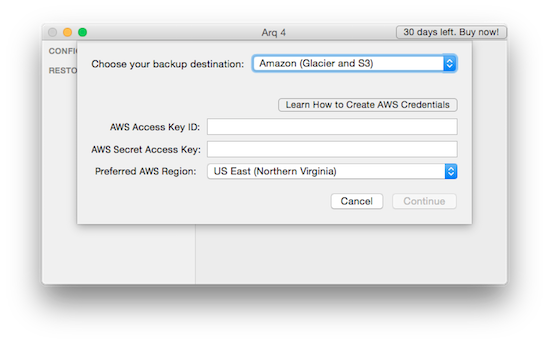
If you’re setting up Arq for the first time, choose “Amazon (S3 and Glacier)” for the destination type and paste your key pair into the fields:
If you’ve already set up Arq and want to add AWS as a destination, go to Arq’s preferences, Destinations tab, click the + button, choose “Amazon (S3 and Glacier)” for the destination type and paste your key pair into the fields.
Create Restricted IAM User
Now Arq has an “admin” IAM user for accessing your AWS account. With it, Arq can find all Arq backups in your AWS account. This is useful if, for example, you’re backing up multiple computers and want to see the other computers’ backup records.
But if you’d rather restrict Arq on this computer to only access its own data, you can instruct Arq to automatically create an IAM user with just enough permission to do its job.
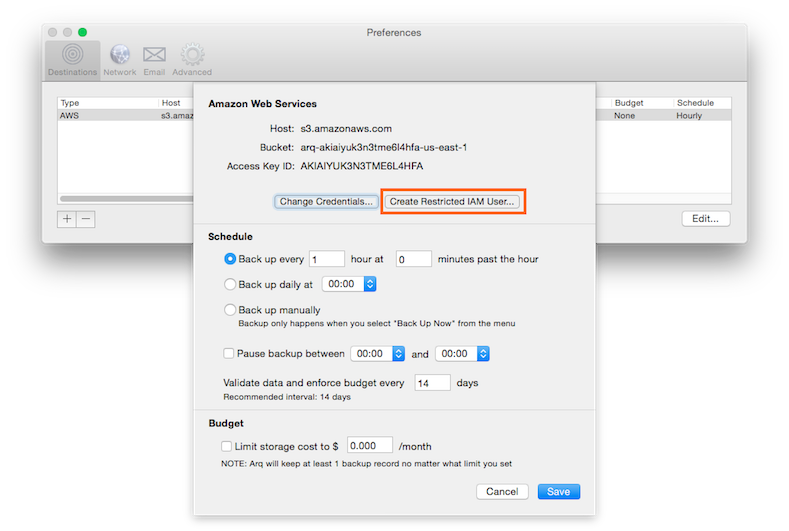
Go to Arq’s preferences, Destinations tab, and double-click your AWS destination. Then click “Create Restricted IAM User”.
 Arq will automatically create a key pair for a new IAM user with just enough permission to read/write this computer’s backup data. Arq will use this new IAM user’s key pair from now on. You can delete the “admin” IAM user you created if you like; delete it through the AWS IAM console.
