Backup to Synology NAS using Minio and Arq
Arq can back up to any folder you want, so you could configure it to back up to a folder that lives on your NAS, but there’s a better way: use Minio!
Minio is an open-source S3-compatible storage server. If you install Minio on your NAS (Synology supports Minio via Docker on many of its NAS devices), Arq can back up to your NAS using Minio and get benefits over SFTP like atomic writes of files (faster and less error checking required by Arq), checksums of uploaded data (so Arq can verify the NAS received the correct data), and much faster validation of data (comparing checksums instead of downloading data to compare).
Install Docker and Minio on Synology NAS
Here are the steps we took to get Minio installed on our Synology DS218+:
- Check Synology’s web site to make sure our model is compatible with the Docker package: Synology Docker package page
- Log into the Synology’s web UI
- Click on Package Center
- Click on All Packages on the left
- Search for Docker
- Click Install next to Docker in the search results
- When it’s installed, click Open
- In the Docker window, click on Registry. Then search for minio.
- Click on minio/minio in the search results and click Download. Choose the tag “latest”.
We weren’t able to successfully create and run a Docker container through the Package Center UI, but it was easy via the command line. Just ssh into your Synology NAS with your administrator username/password:
ssh username@synologynasname
Create directories for the data and configuration (these live outside the Docker container):
sudo mkdir -p /volume1/docker/minio/data
sudo mkdir -p /volume1/docker/minio/config
Then tell Docker to create and start a new container called ‘minio’:
sudo docker run -dit --restart unless-stopped -p 9000:9000 --name minio -e "MINIO_ROOT_USER=9AARJMC8QKHNC3M1DA22" -e "MINIO_ROOT_PASSWORD=773NqiryubMiOSokCP3yhFdWemoPWayxbLYAD9F4" -v /volume1/docker/minio/data:/data -v /volume1/docker/minio/config:/root/.minio minio/minio server /data
(In older versions of the Minio container the environment variables are MINIO_ACCESS_KEY and MINIO_SECRET_KEY instead of MINIO_ROOT_USER and MINIO_ROOT_PASSWORD.)
Update Jan 25, 2024: With the latest version of Docker the command should look more like this:
sudo docker run -dit --restart unless-stopped -p 9000:9000 -p 9001:9001 --name minio -e "MINIO_ROOT_USER=9AARJMC8QKHNC3M1DA22" -e "MINIO_ROOT_PASSWORD=773NqiryubMiOSokCP3yhFdWemoPWayxbLYAD9F4" -v /volume1/docker/minio/data:/data -v /volume1/docker/minio/config:/root/.minio minio/minio server /data --console-address ":9001"
Configure Arq to Back Up to Synology via Minio
Now that you’ve got a Minio server running on your Synology NAS, configure Arq to back up to it. (The following screen shots are from Arq for Mac but the process is the same with Arq for Windows):
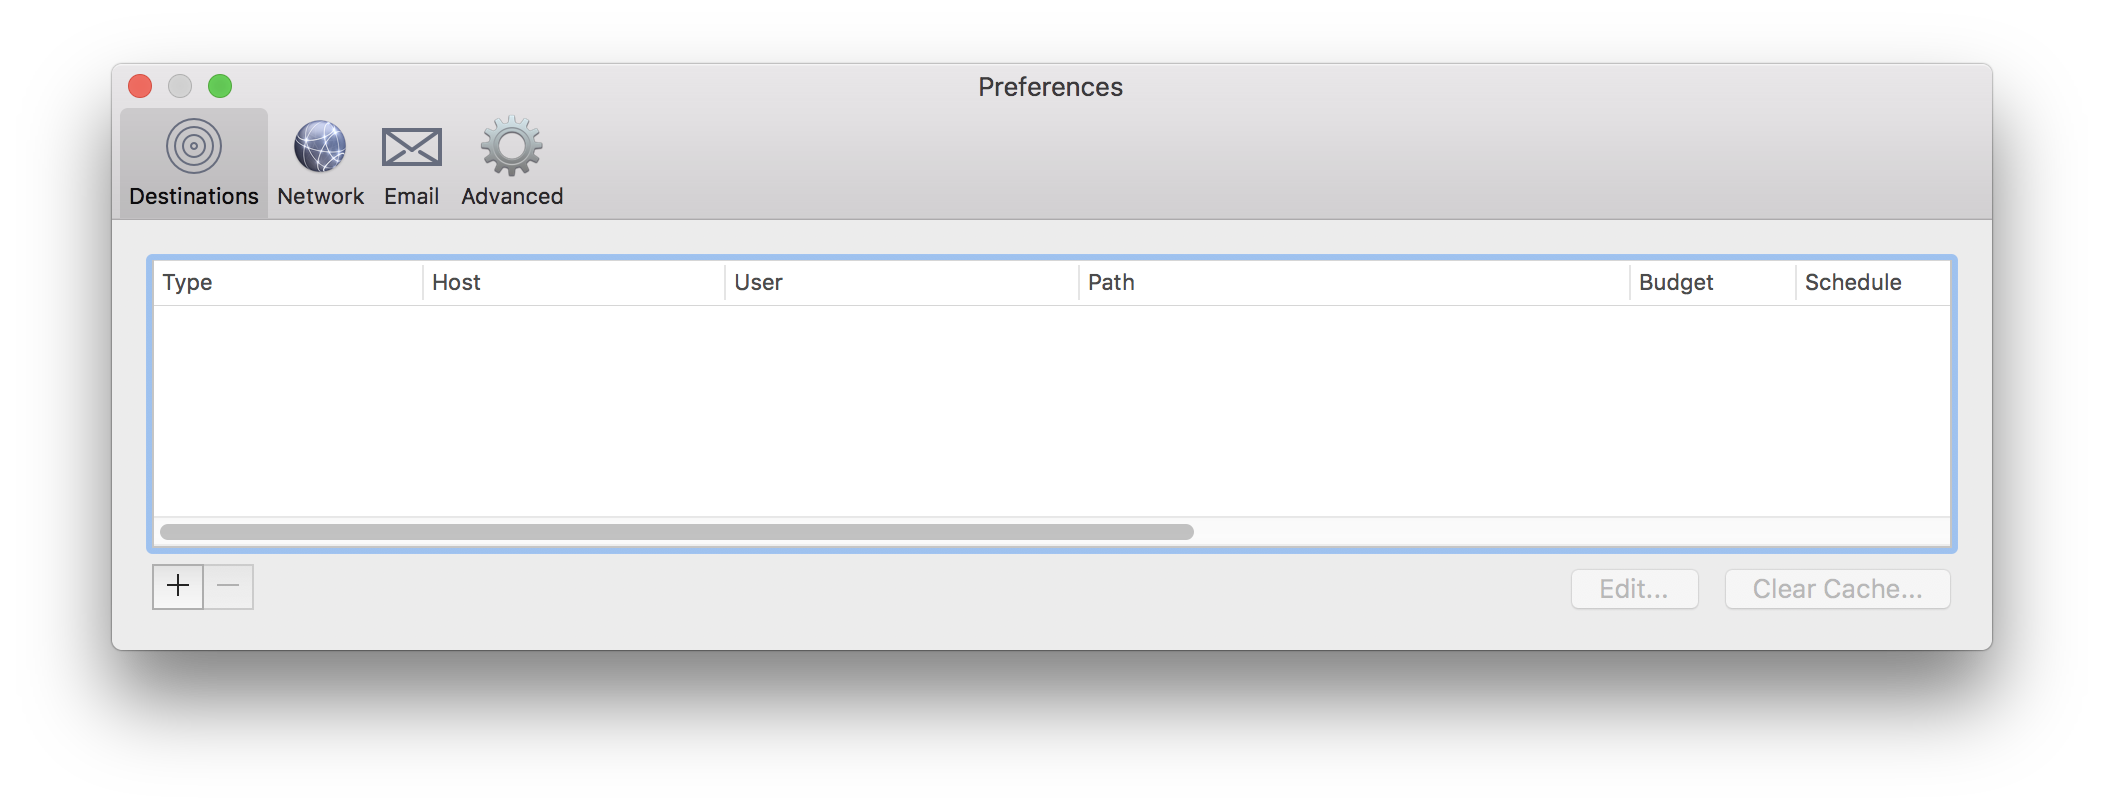
- Pick Preferences from Arq’s menu to open Arq’s preferences window.

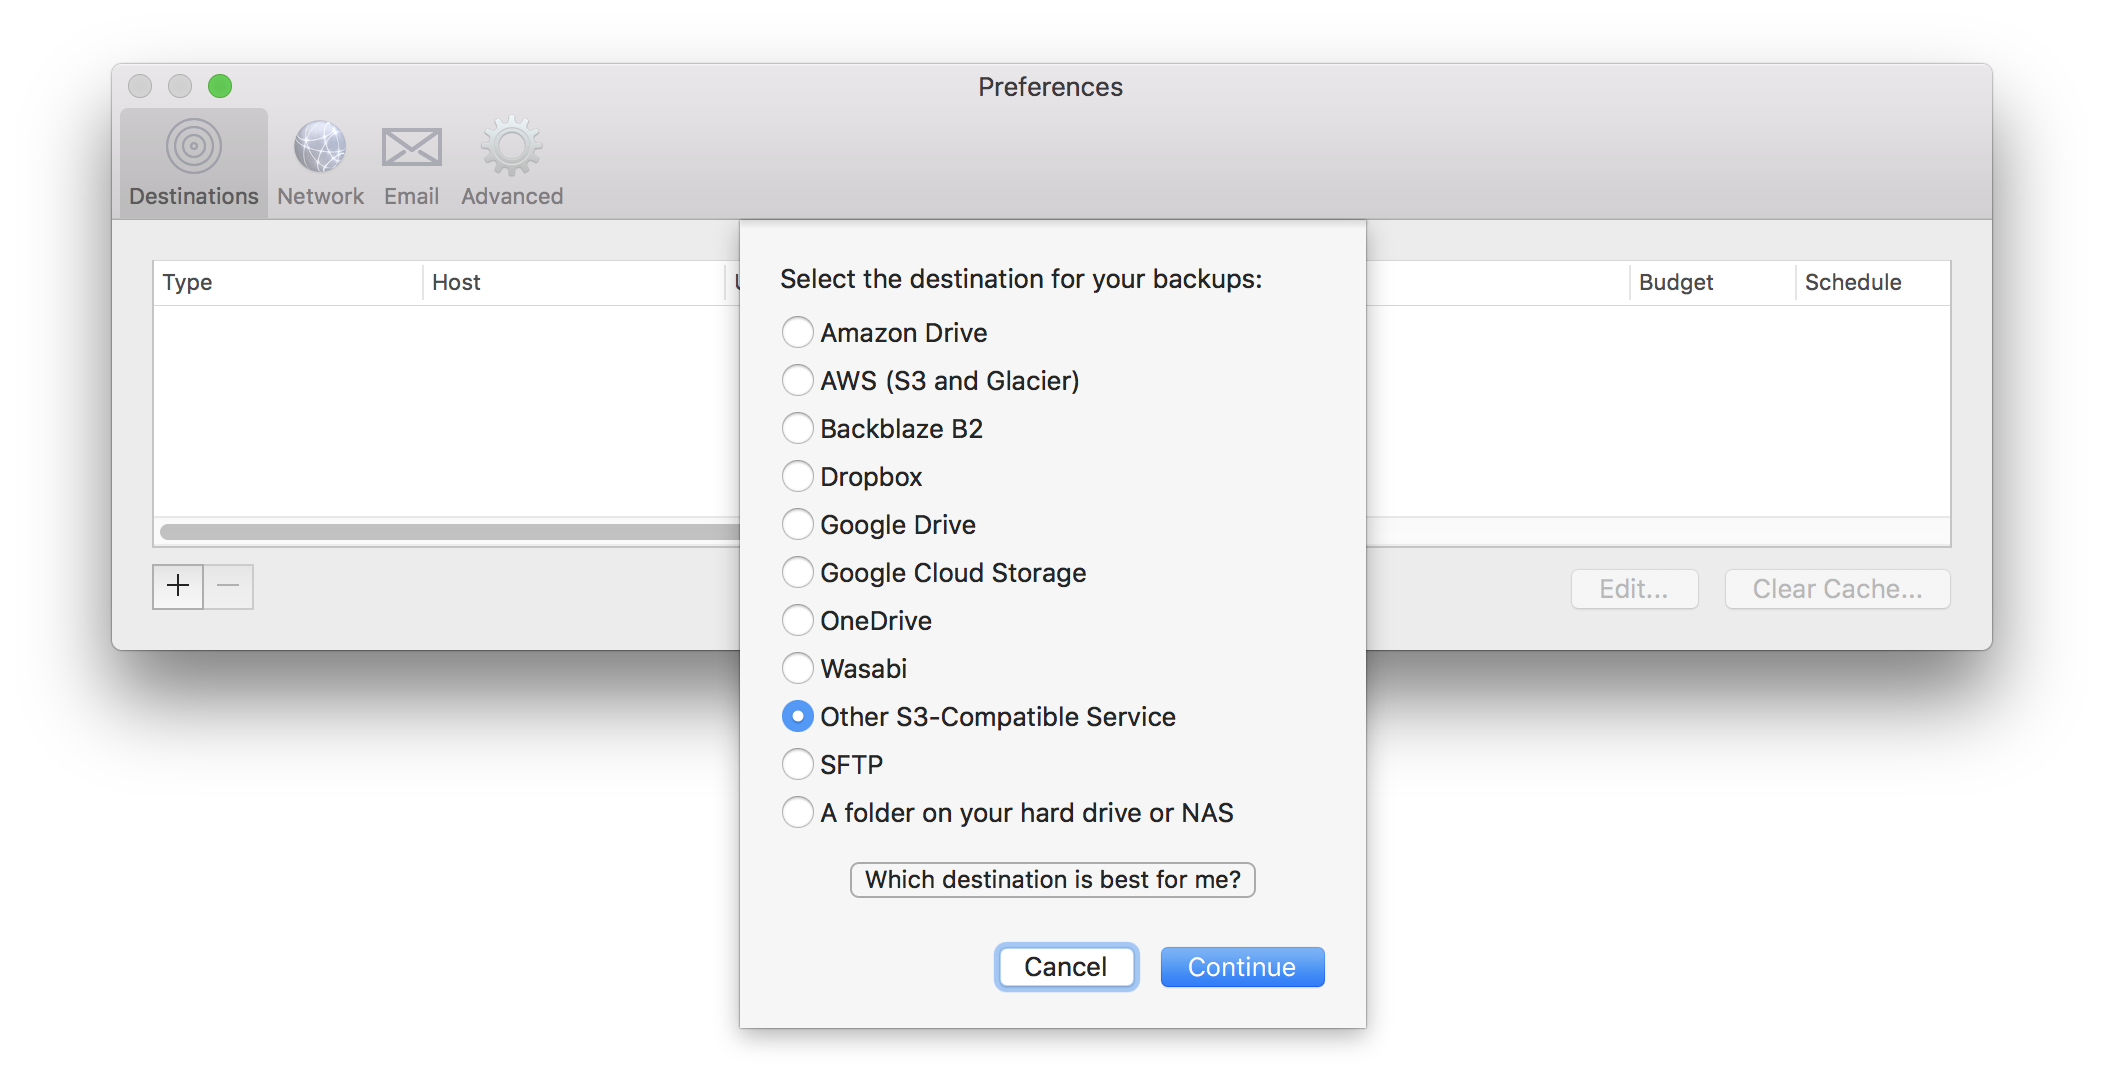
- Click the + button to add your destination. Choose “Other S3-Compatible Service” and click Continue.

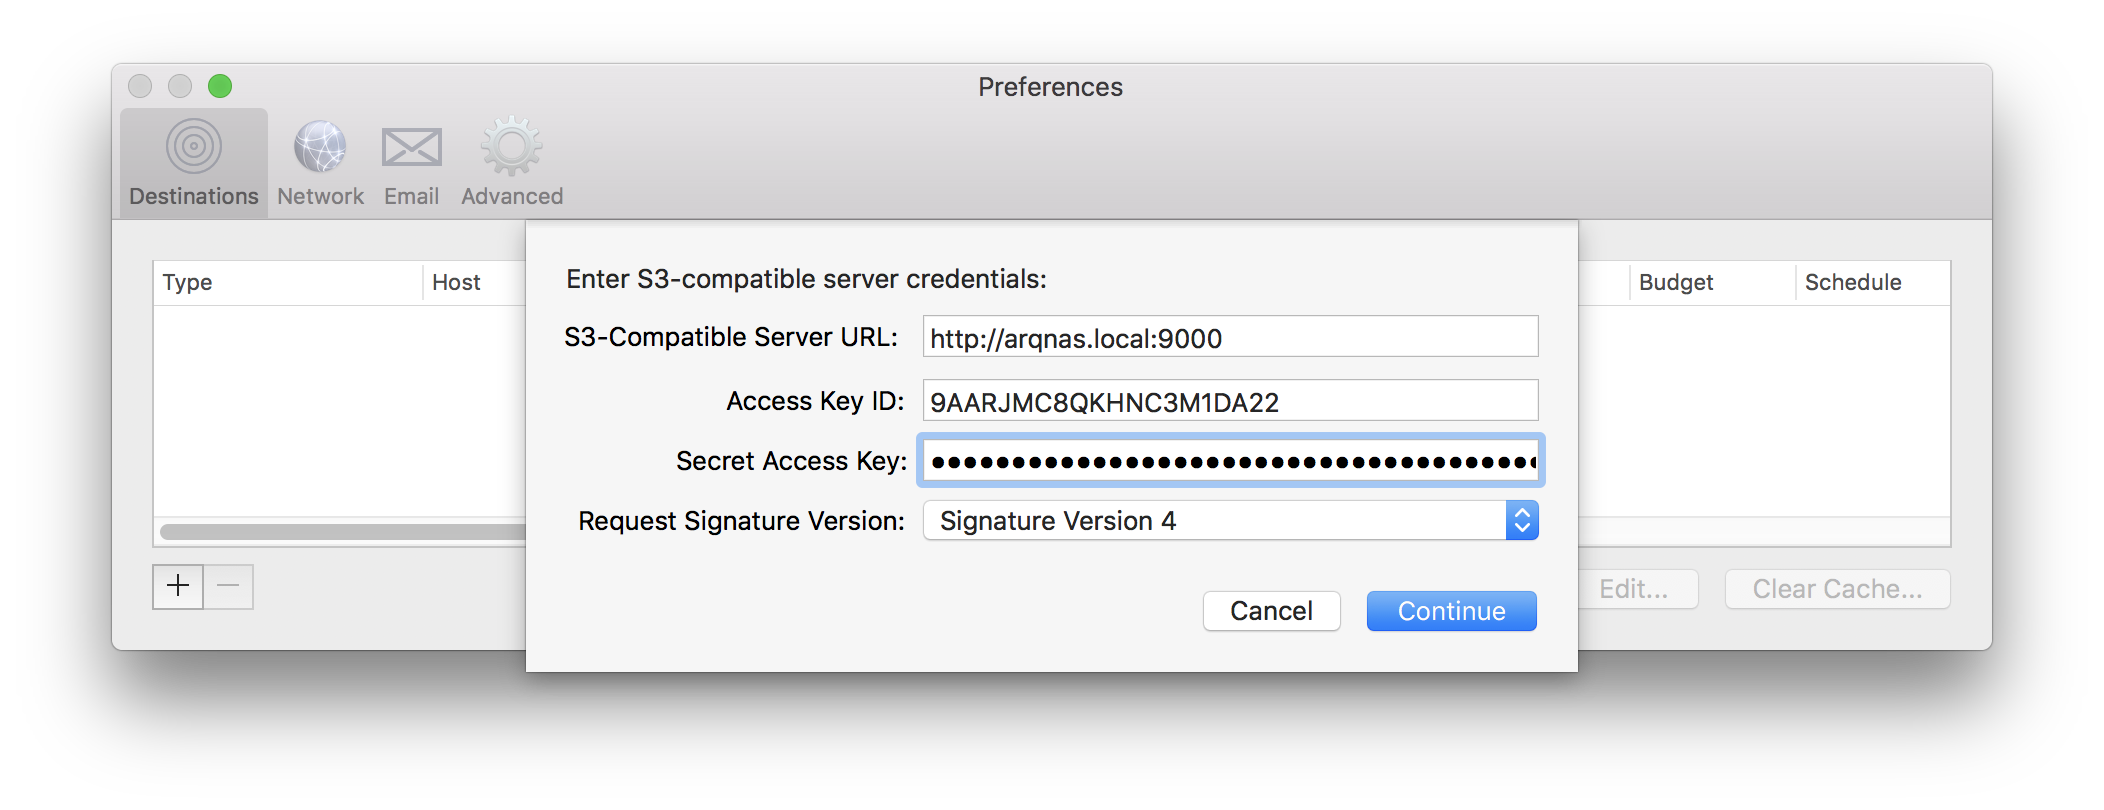
- Enter the URL for your minio server in the form of http://synologynasname:9000. Enter the access key ID and secret access key you provided to the “docker run” command previously. Choose Signature Version 4. Click Continue.

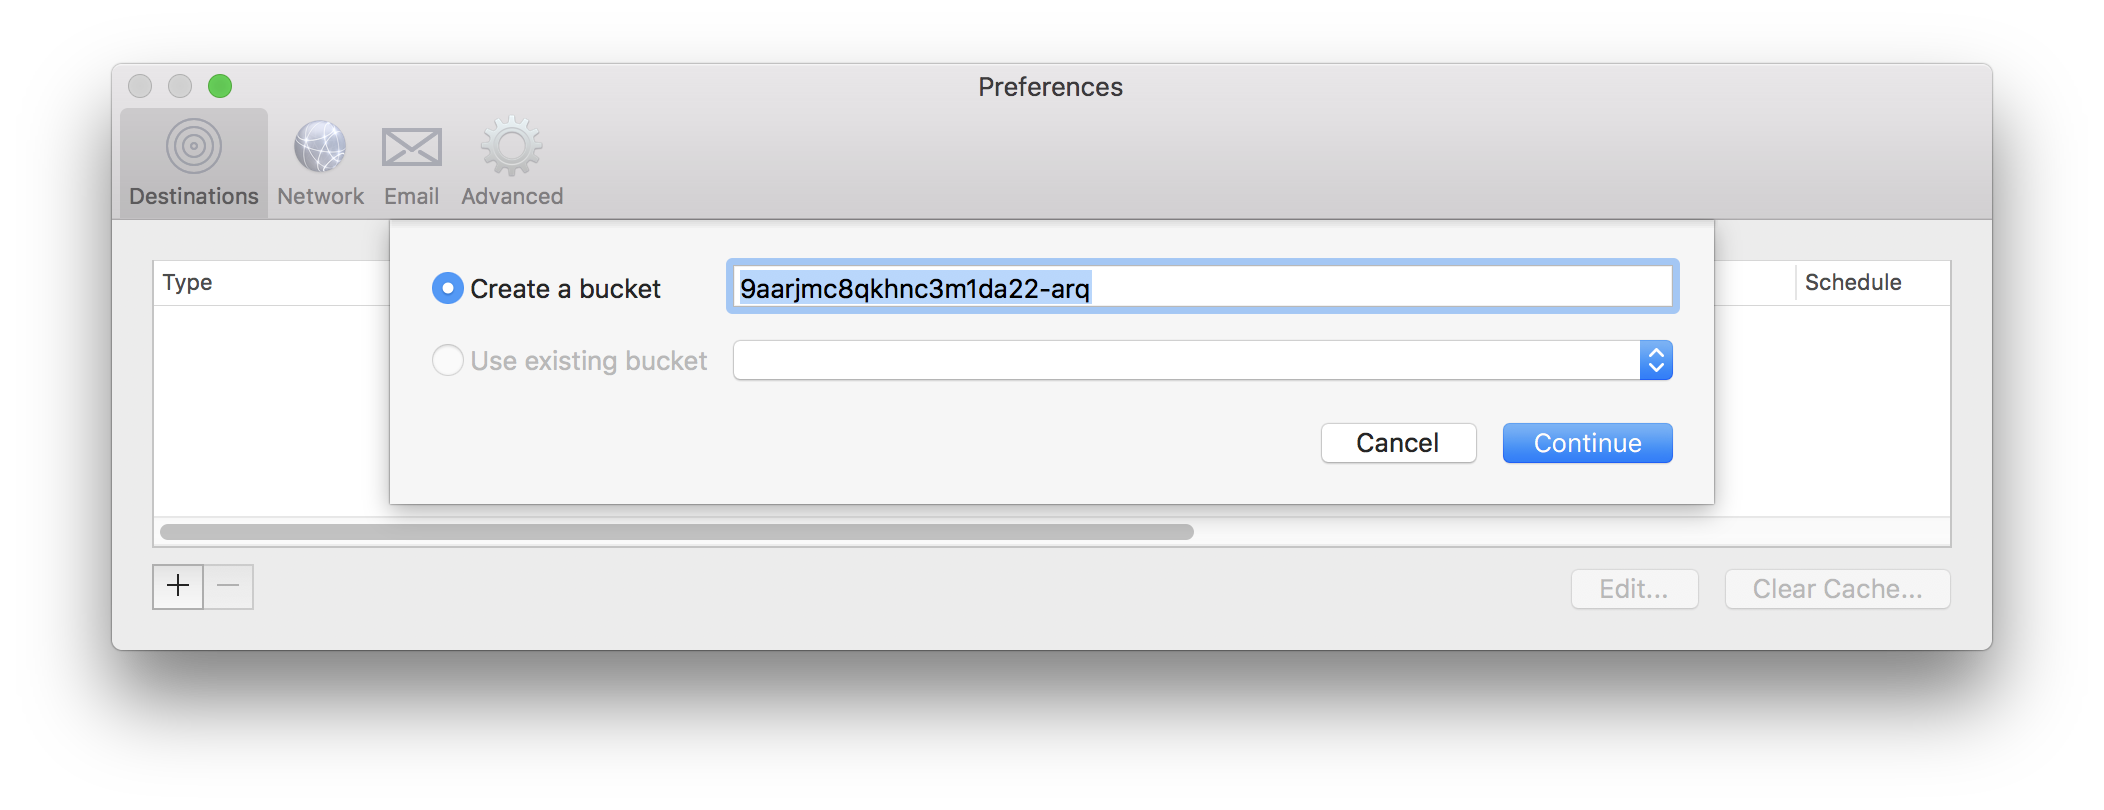
- Click Continue to create your bucket on your minio server.

- Pick “Add Folder to Backups” from Arq’s menu to add the folder(s) you want backed up. When you add the first one, Arq will ask you to choose an encryption password. Please write it down somewhere! Without it you won’t be able to decrypt your backups if your computer is lost.
That’s it! Arq will back up whatever folder(s) you selected, every hour.
As always, if you have questions please email us as support@arqbackup.com.
Thanks for using Arq!